
How to Control What You See Under Your “My Pipeline” View
1 Open up Point
2 Click on Utilities
3 Click on Load Field ID
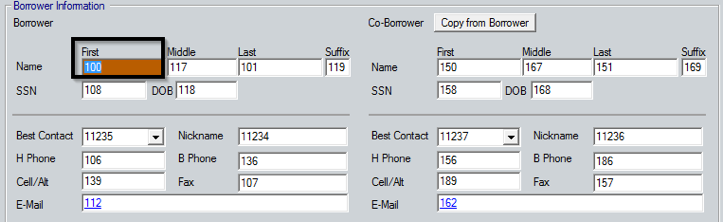
4 Click on Borrower – this will open up a blank Loan file and display all the field ID numbers for each field for you. See in the screen shot below Borrower first name is Field ID # 100. You can find the field ID number for any field just by selecting that screen
5 Now open up Pulse
6 Click on Setting
7 Click on Pipeline View
8 On this screen you will add all the fields you want to see on your “My Pipeline View”
9 You do this by clicking on Add
10 Typing the field ID number in the first box and selecting the field when it appears
11 Then type the Column header name in the next box – Continue this process until you have setup all the Column/Fields you want to display on your My Pipeline View. 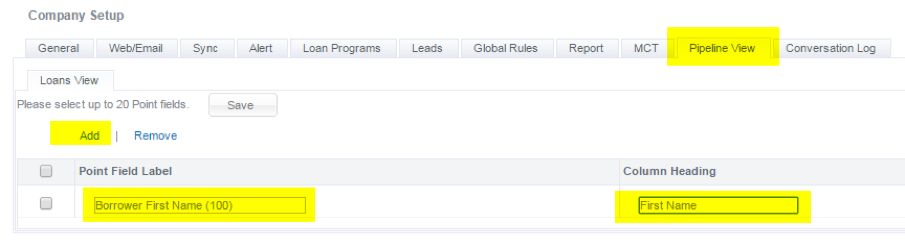
12 When you done click on Save
13 Now click on “My Account” Left hand menu bar
14 Click on “Pipeline View”
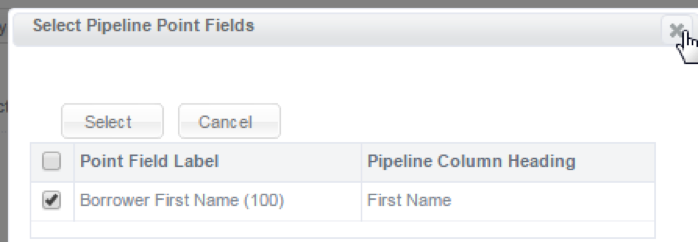
15 Don’t check the boxes that are hardcode, but instead go to the box labeled Point Fields and click on ADD. From the pop up screen check the box next to the first field you want to see and click on select, continue this until you have added all your fields. Do not check them all at one time or they will not appear in the order you want them to, select one at a time
16 Save the screen
17 Click on your My Pipeline view and you should see the results of your hard work.
Recent Comments